Customizing the Space Blueprint Form
Adil Nasri
When creating new spaces the 'Create Space' dialog will be prompted. Within there users get to choose a Space Blueprint and interact with the Space Blueprint Form. To configure the Space Blueprint form click on the second icon from the left.
![]()
Configuring the Space Blueprint Form
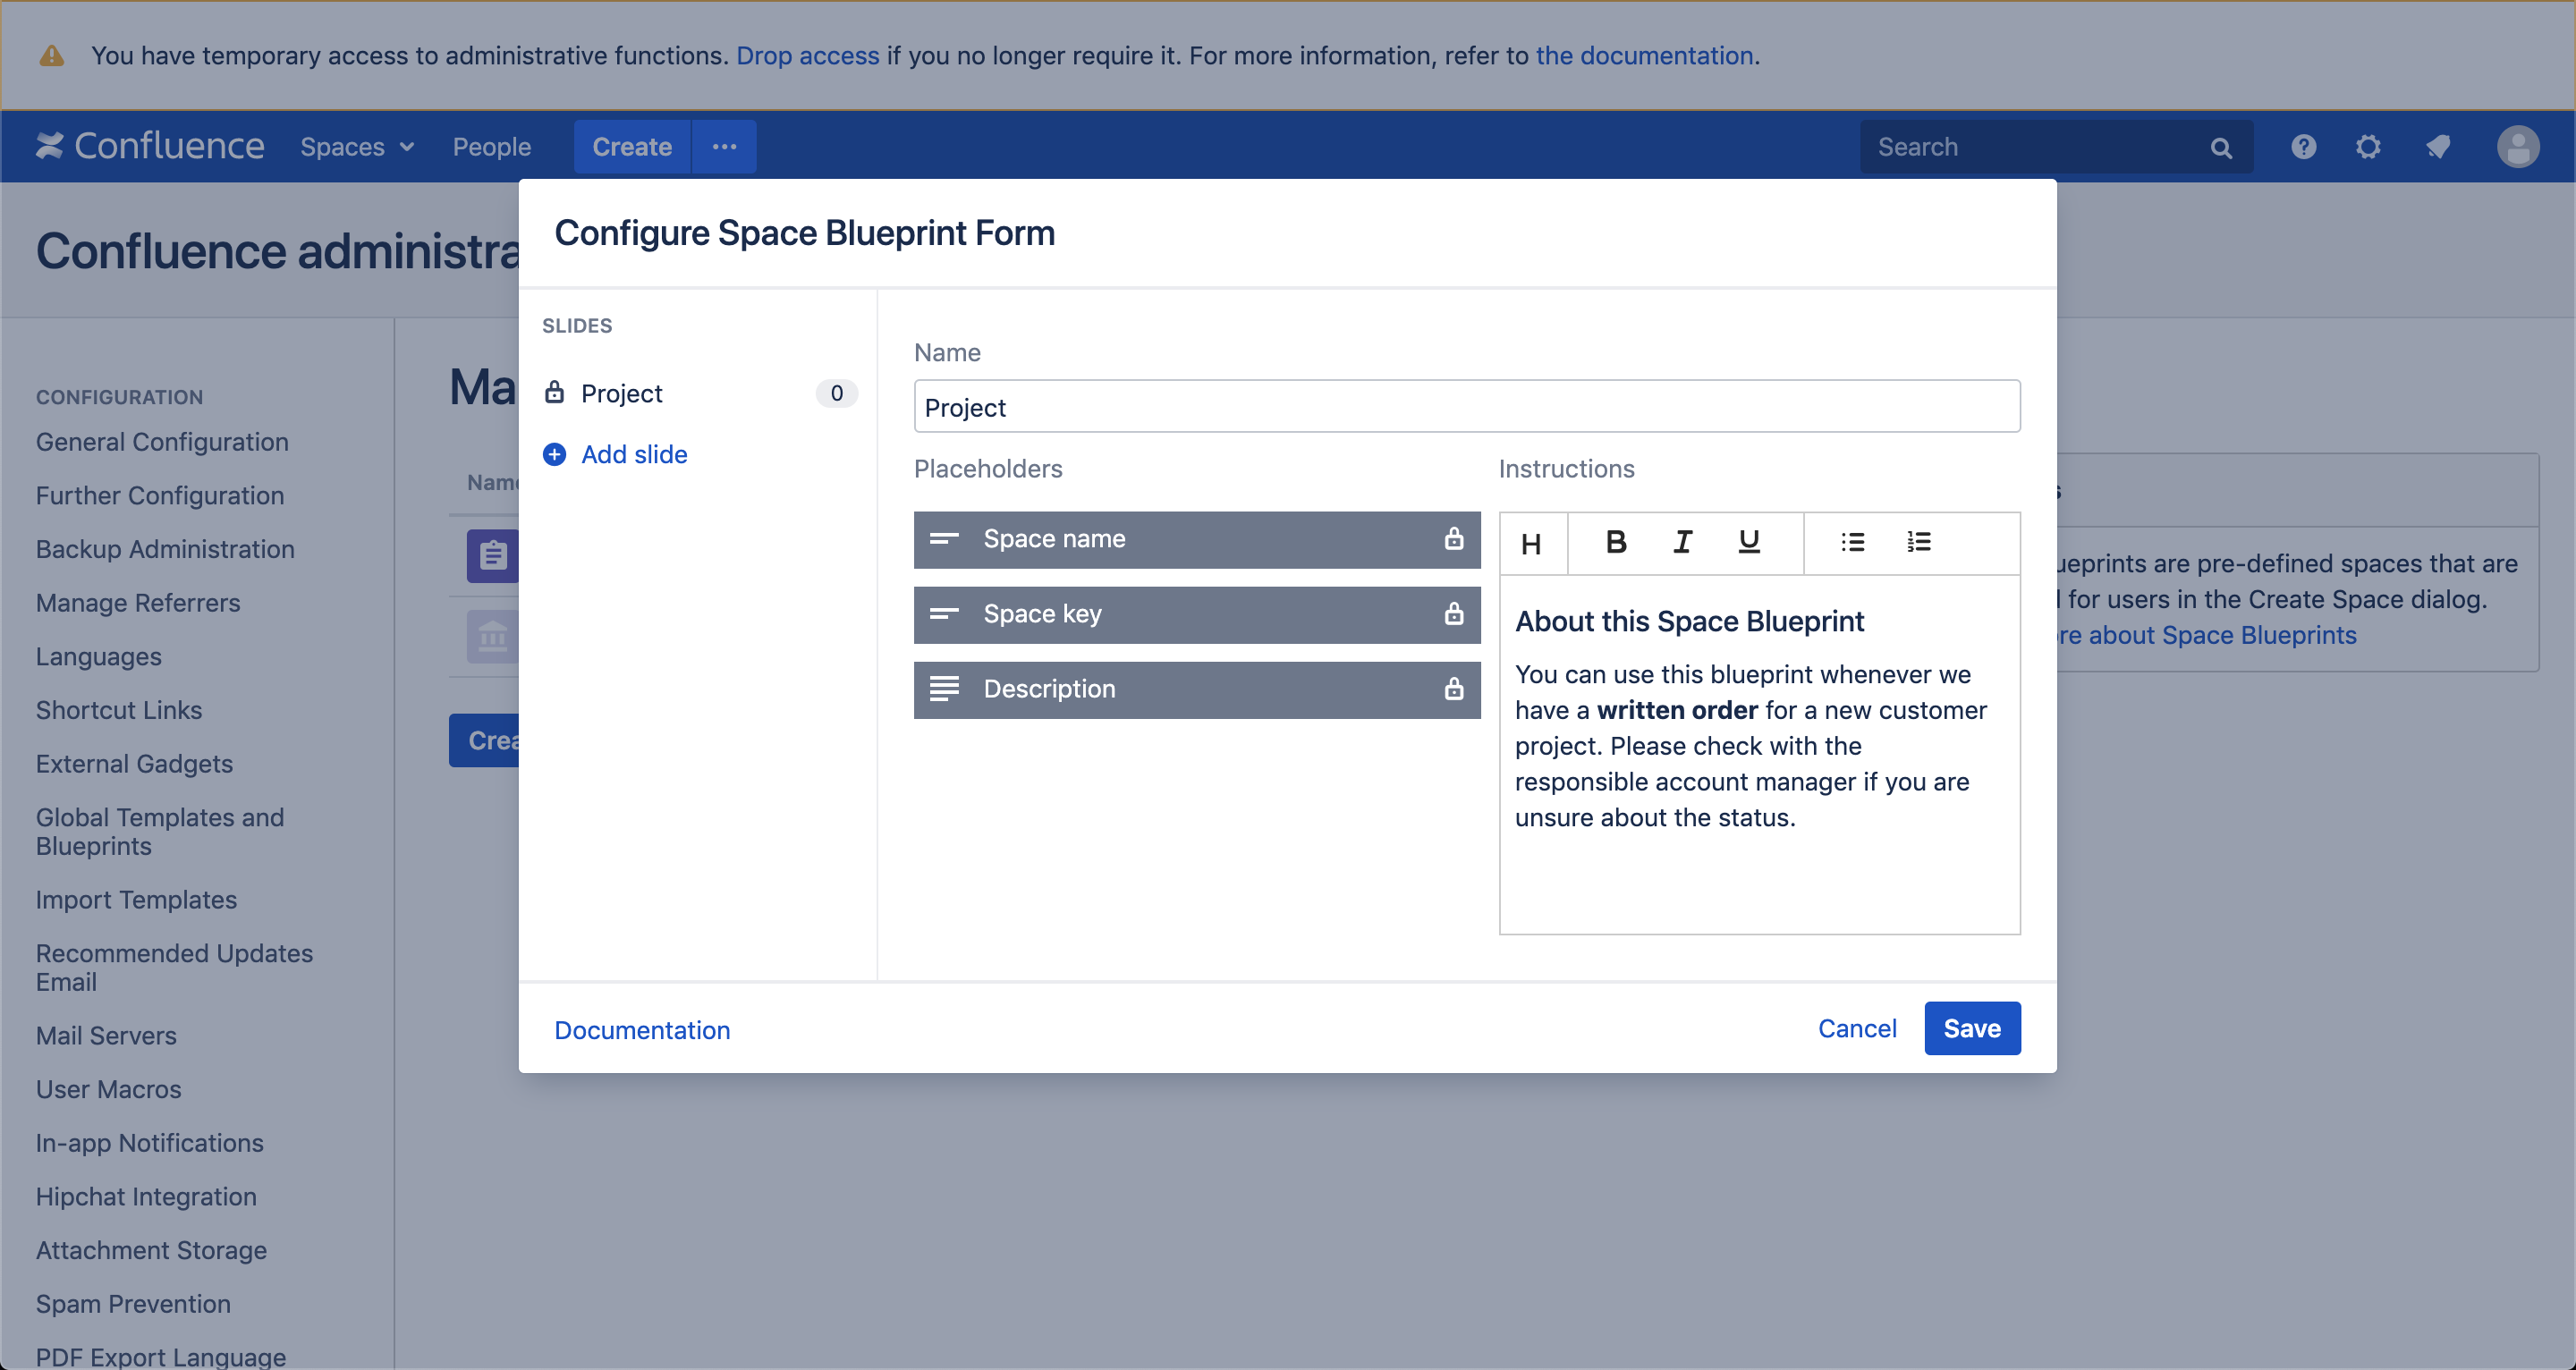
The Blueprint Creator allows you to customize the form by adding instructions. It also displays the system placeholders 'Space name', 'Space key' and 'Description'. These three can neither be deleted nor moved.
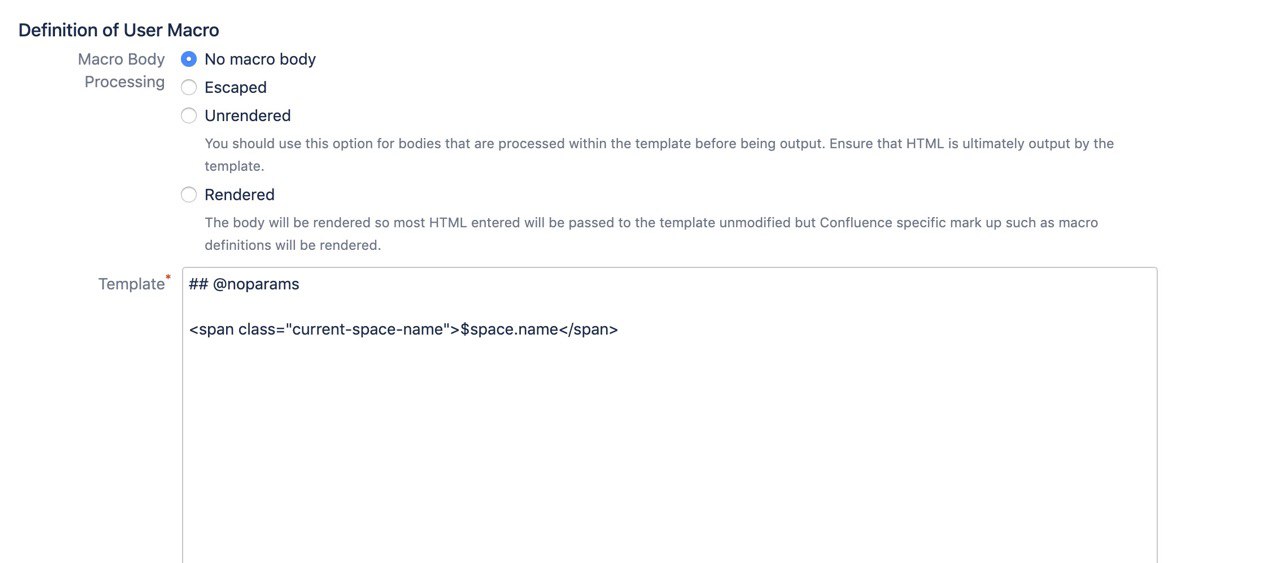
The system placeholders are not available as regular placeholders as they cannot be customized in any way. If you want to embed them on a Confluence page, you can create a user macro for that.
Space name
| Macro details field | Description |
|---|---|
| Macro name | currentspacename |
Visibility | Visible to all users |
| Macro Title | Current Space Name |
| Description | Displays the name of the current space. |
| Categories | Confluence content |
| Icon URL | Enter an absolute URL (for example http://mysite.com/mypath/status.png) or path relative to the Confluence base URL (for example /images/icons/macrobrowser/status.png) if you want the macro browser to display an icon for your macro. |
| Documentation URL | If you have documentation for your macro, enter the URL here. |
| Macro Body Processing | No macro body |
## @noparams
<span class="current-space-name">$space.name</span>
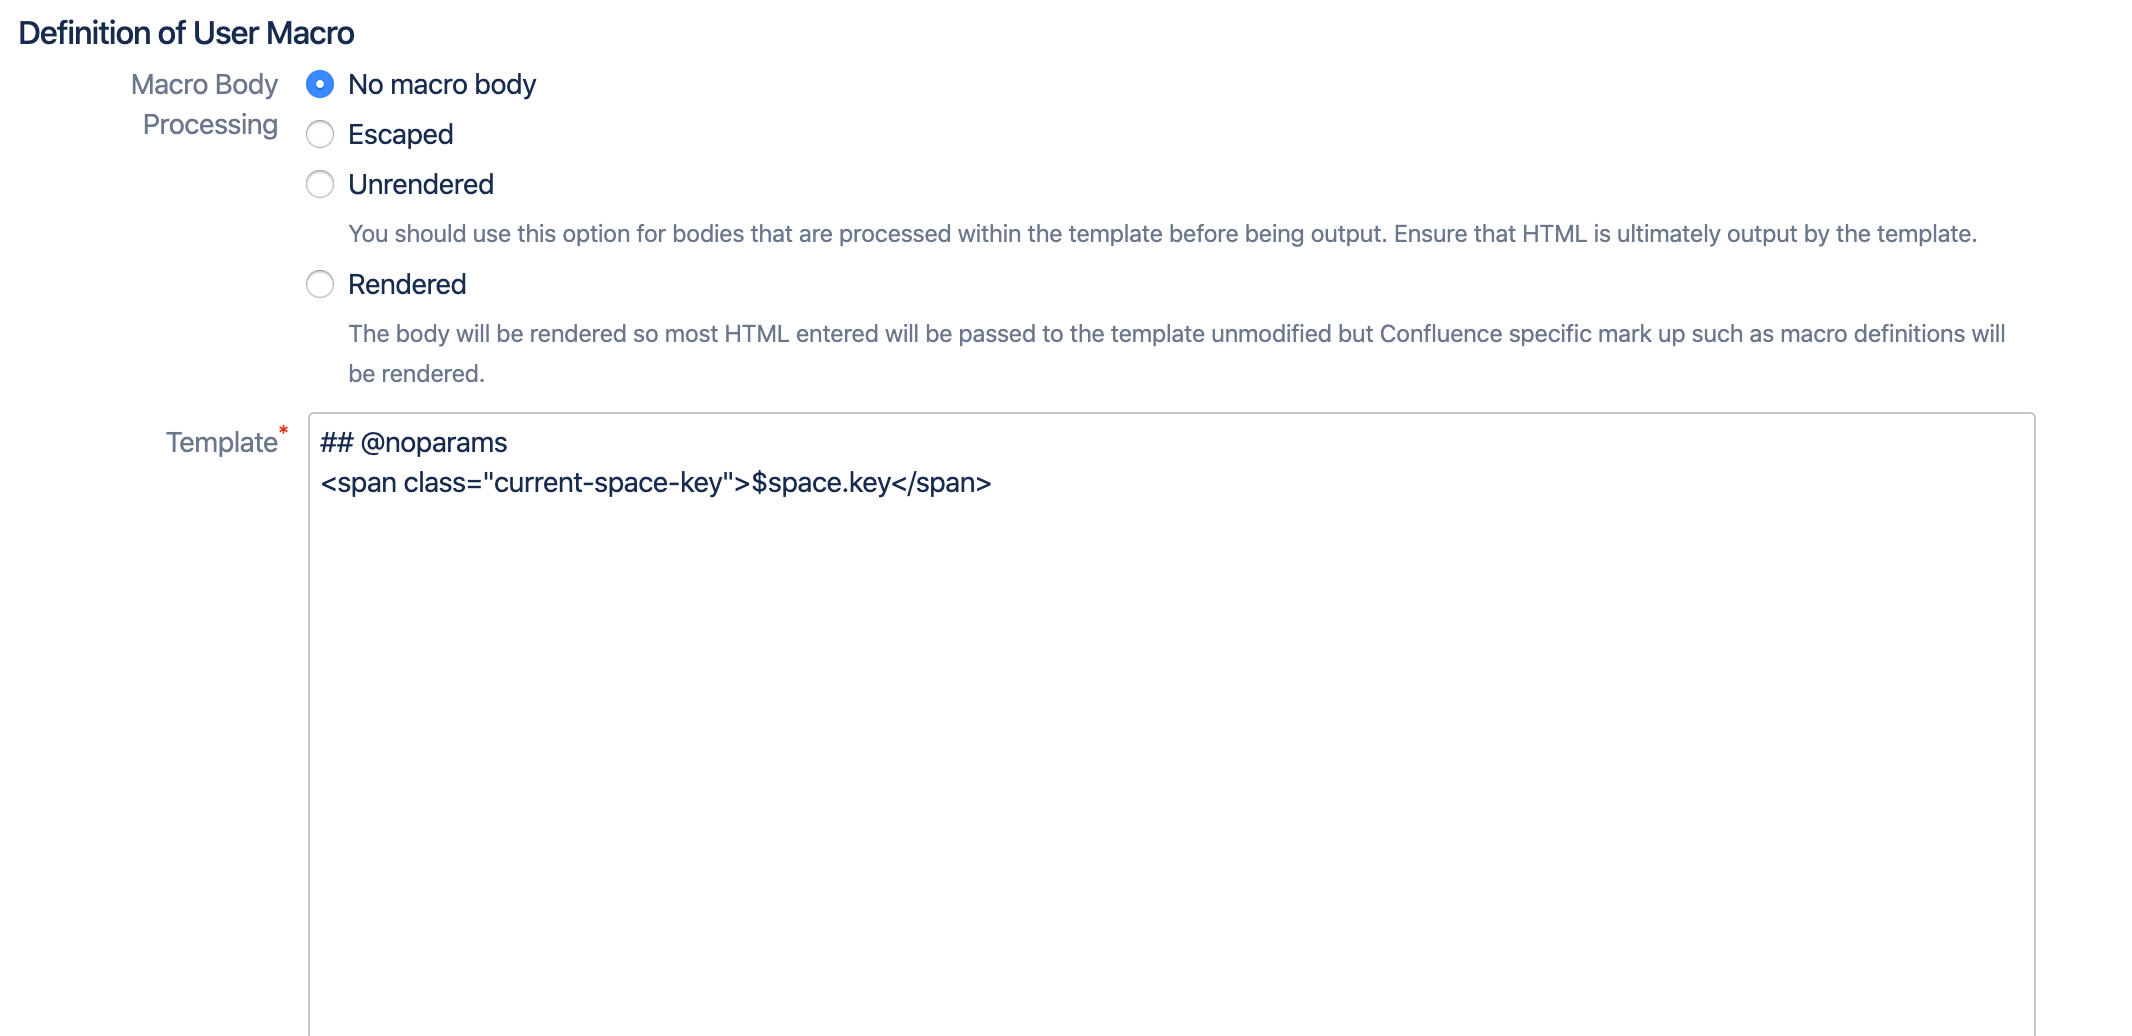
Space key
| Macro details field | Description |
|---|---|
| Macro name | currentspacekey |
| Visibility | Visible to all users |
| Macro Title | Current Space Name |
| Description | Displays the key of the current space. |
| Categories | Confluence content |
| Icon URL | Enter an absolute URL (for example http://mysite.com/mypath/status.png) or path relative to the Confluence base URL (for example /images/icons/macrobrowser/status.png) if you want the macro browser to display an icon for your macro. |
| Documentation URL | If you have documentation for your macro, enter the URL here. |
| Macro Body Processing | No macro body |
## @noparams
<span class="current-space-key">$space.key</span>
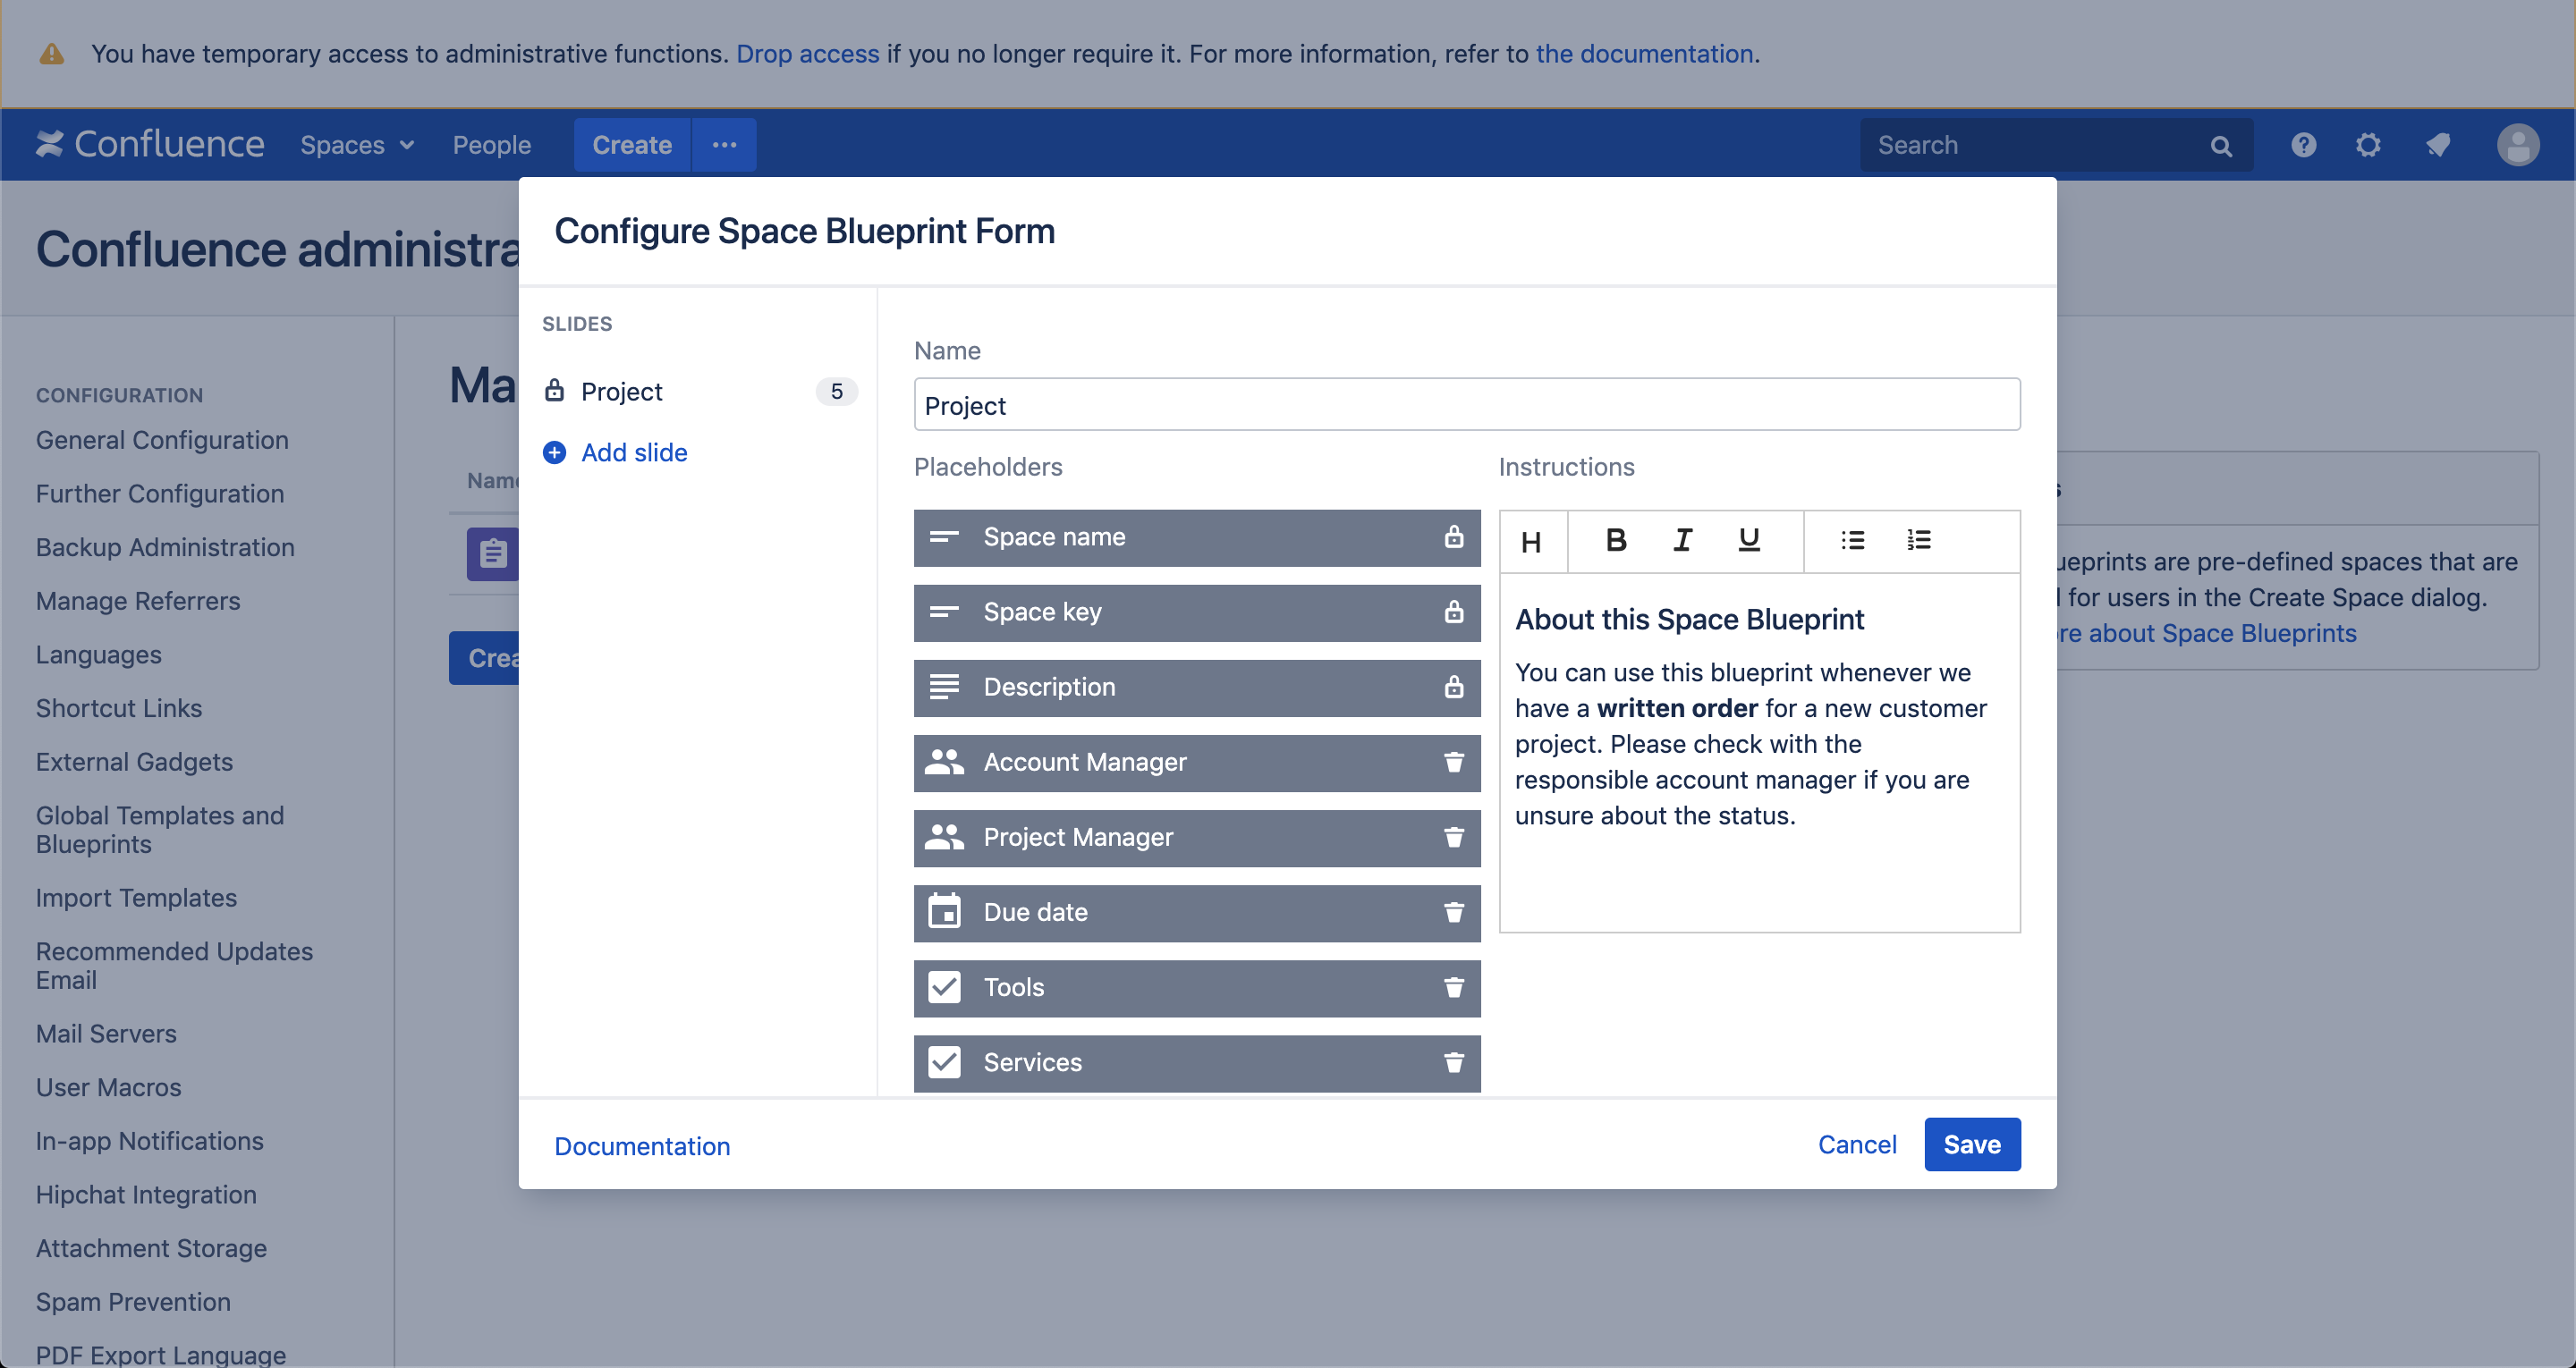
If you are using placeholders in your Space Blueprint this is where they will be prompted to users.
Adding slides
To not overwhelm the user with a very long form and provide him with contextual instructions you can add slides to the Space Blueprint Form and assign placeholders to them (pagination).
Click on '![]() Add slide' to create a new page for the form and move the placeholders you want to by drag & drop. The order of the placeholders matches the view in 'Create space' dialog.
Add slide' to create a new page for the form and move the placeholders you want to by drag & drop. The order of the placeholders matches the view in 'Create space' dialog.
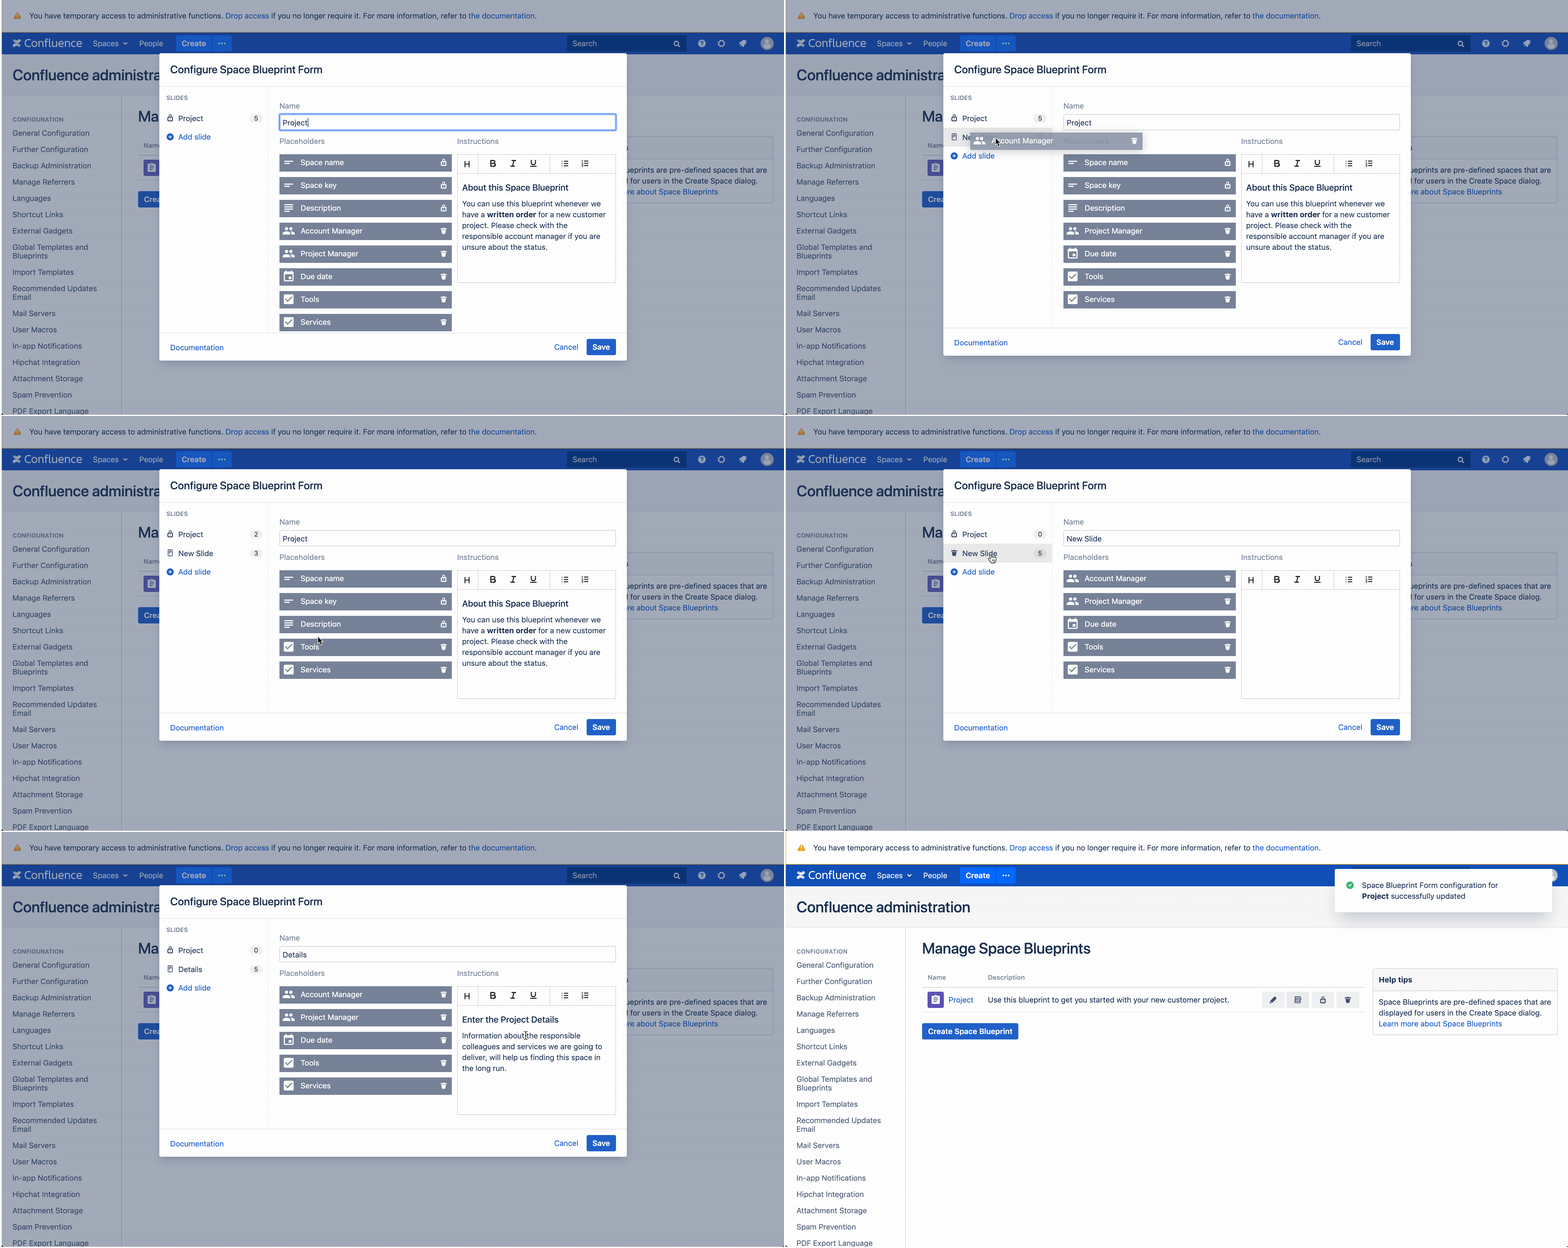
You can also add instructions to each slide helping users understand how to use the placeholders.
Deleting placeholders permanently
If a placeholder is not required anymore you only need to click on the delete icon.
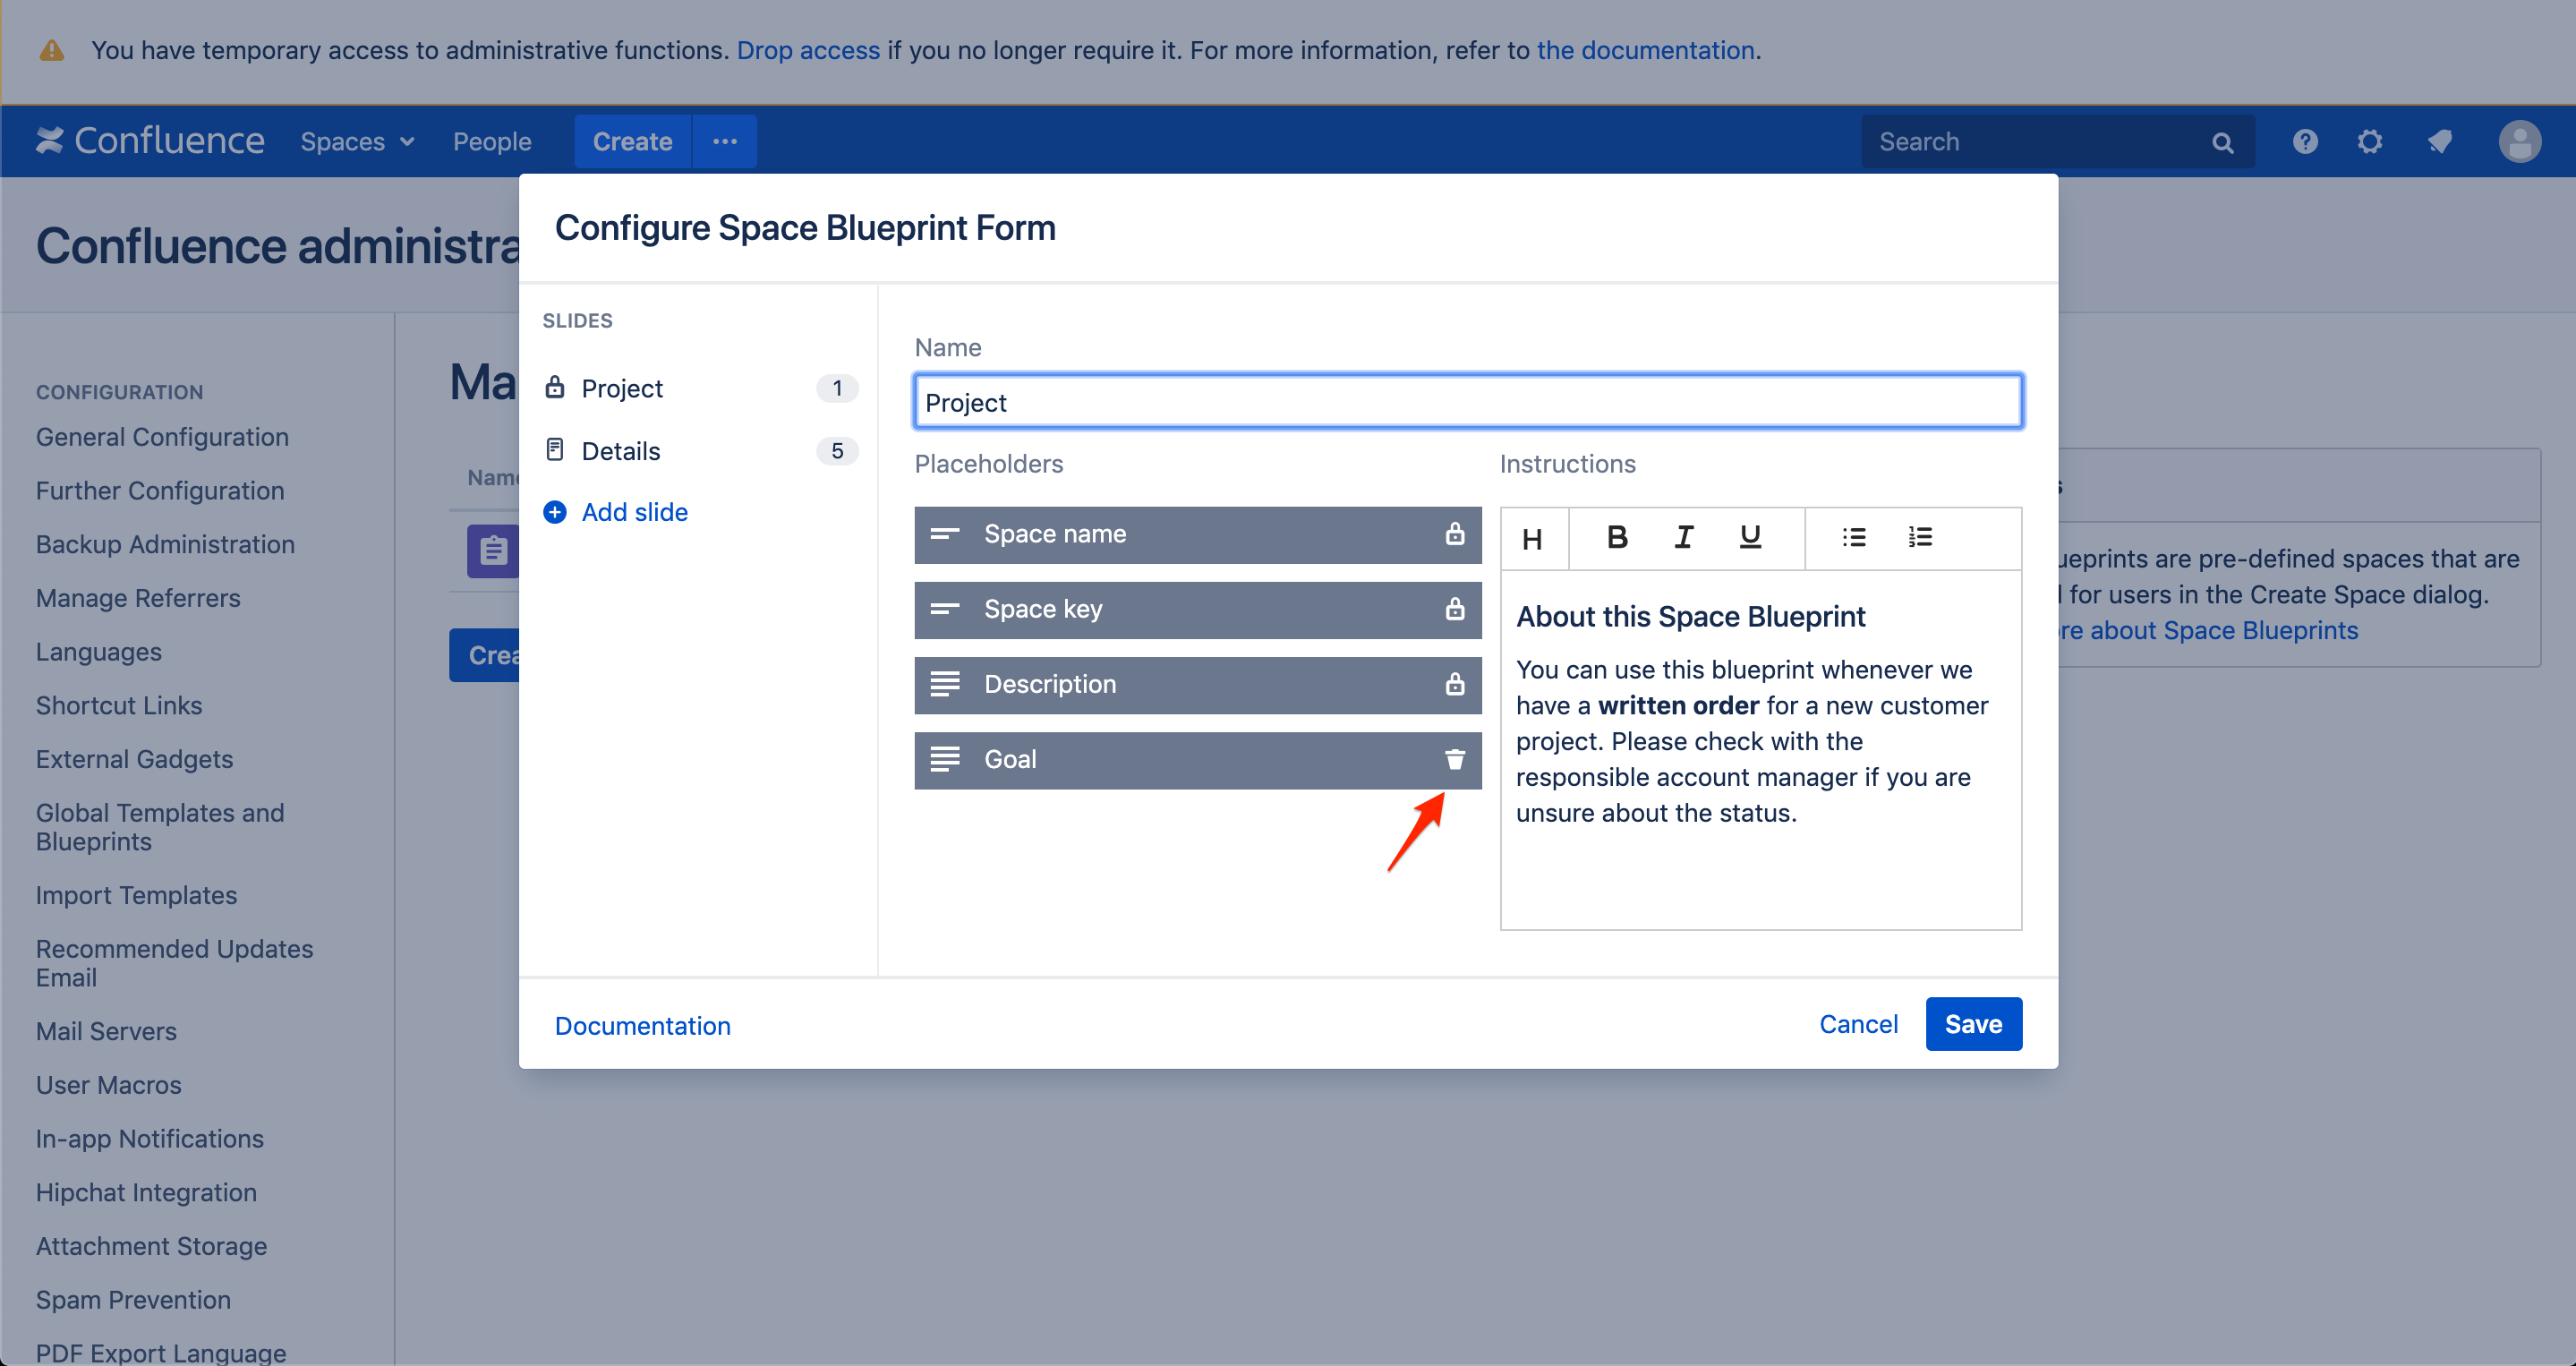
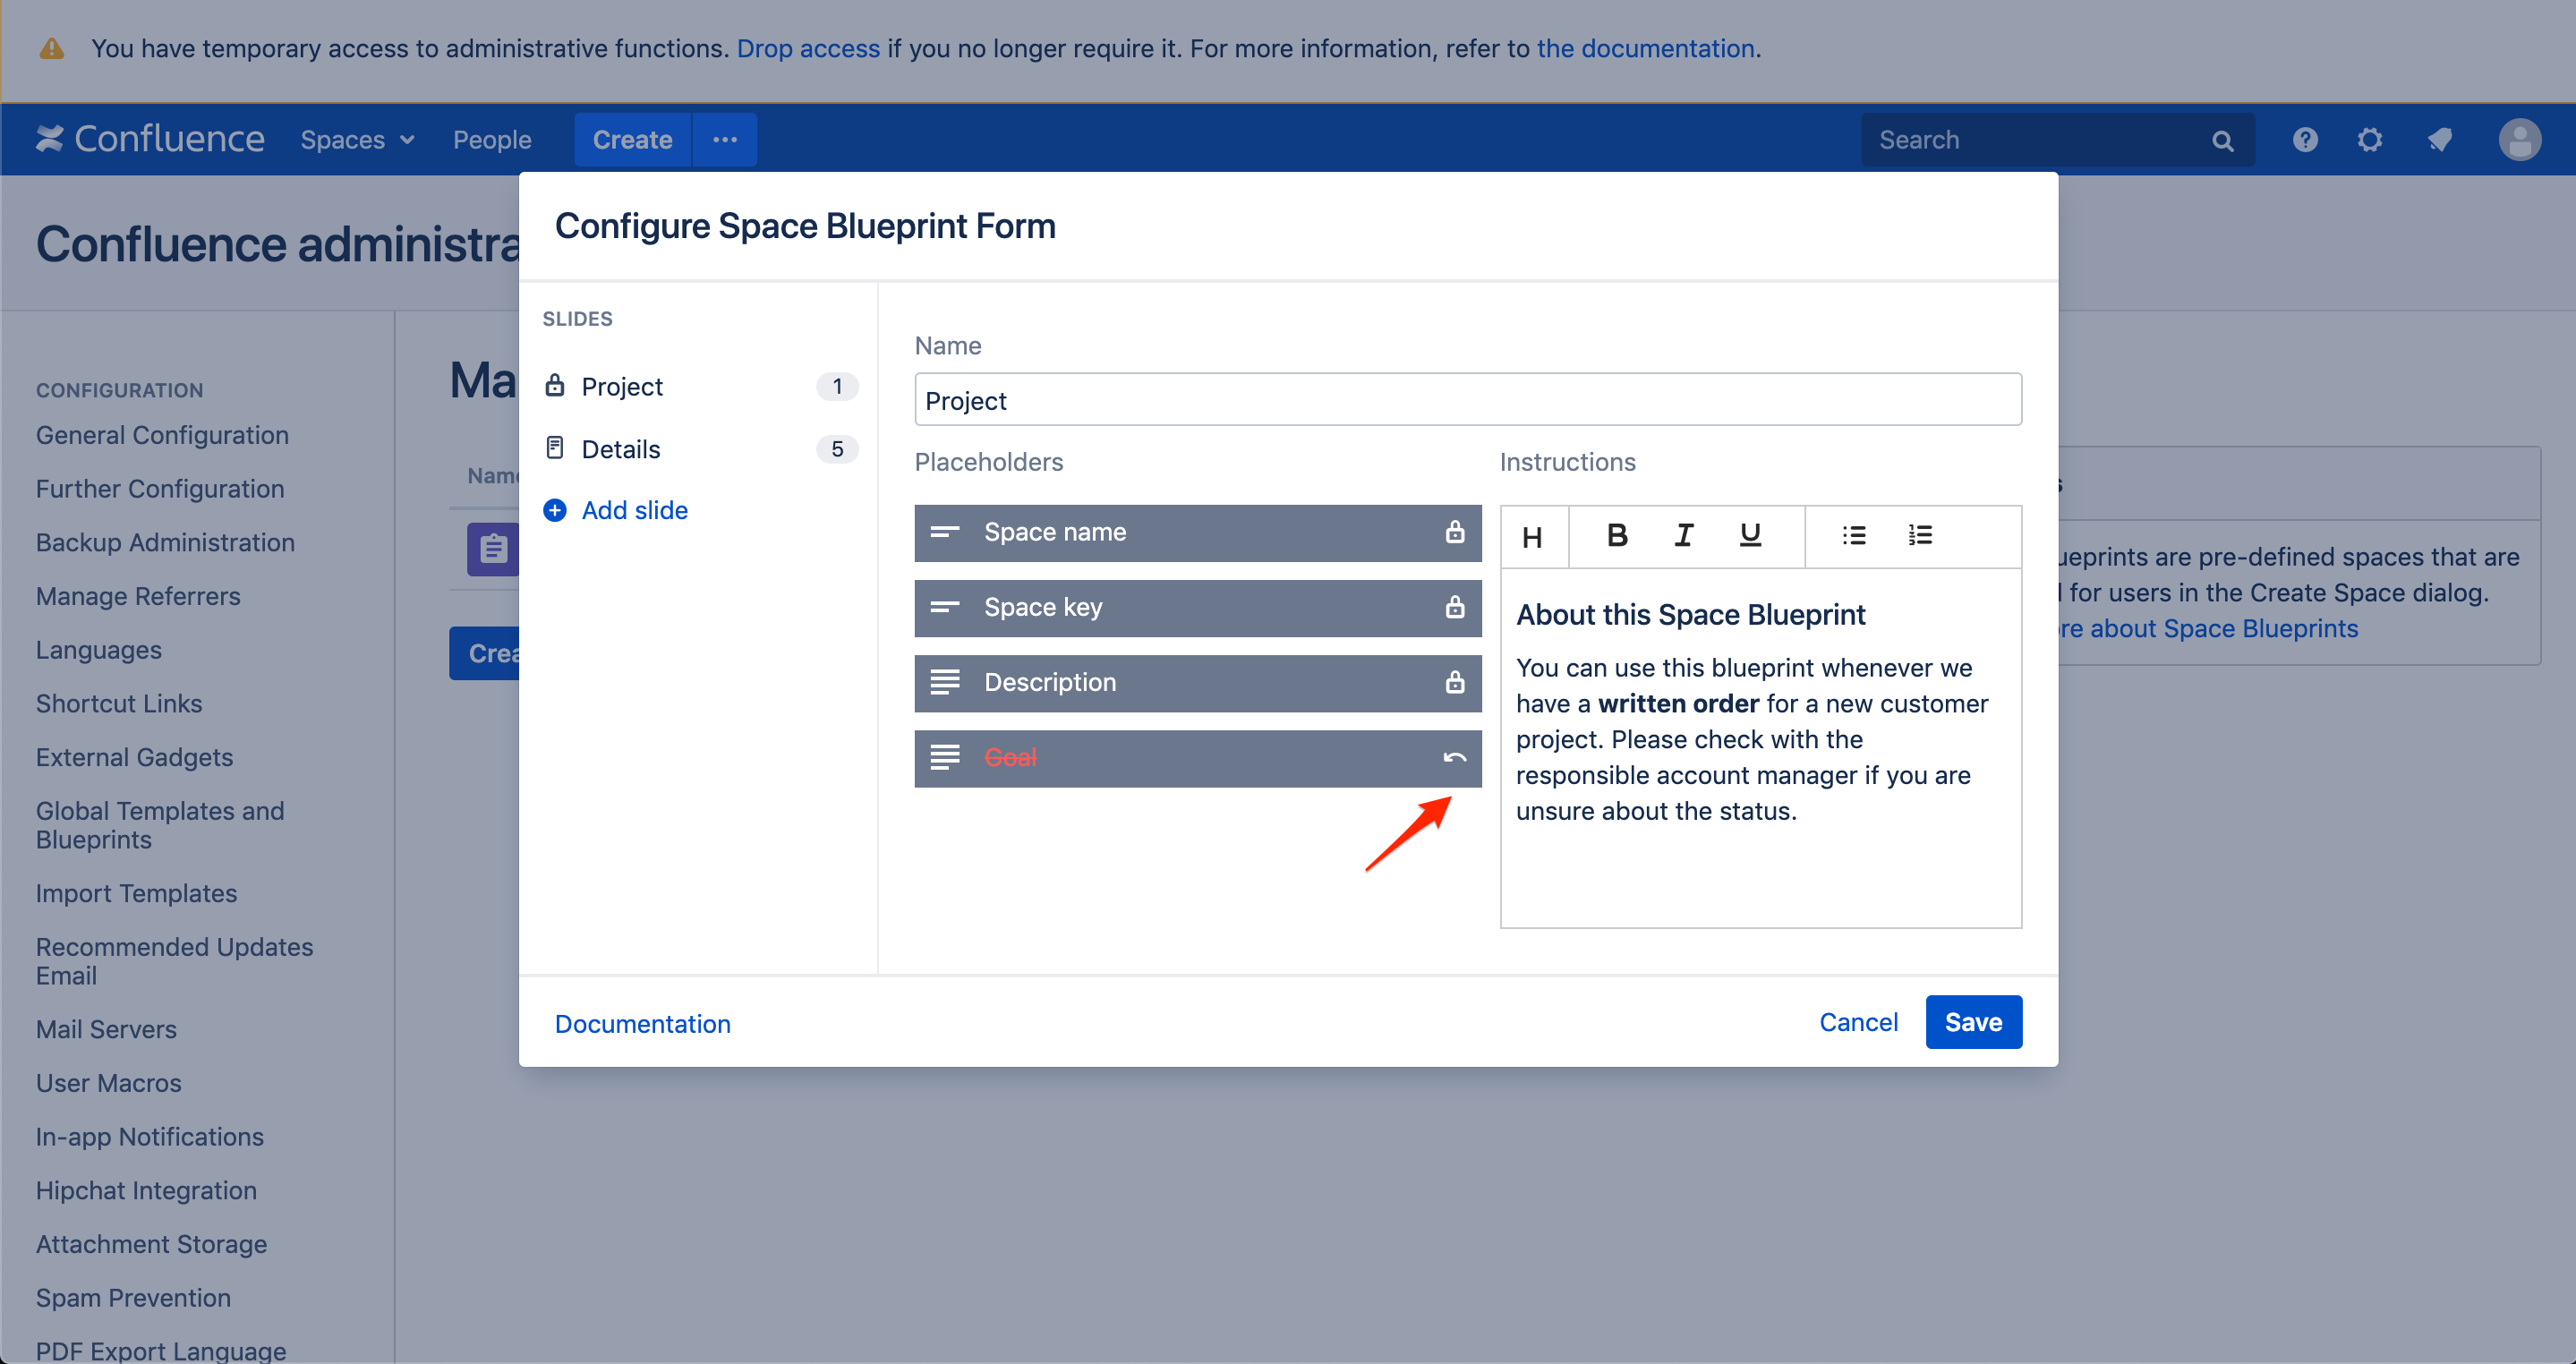
The placeholder will be marked by deletion. If you reconsider you can revert the decision by clicking on the revert icon or by clicking on 'Cancel'.
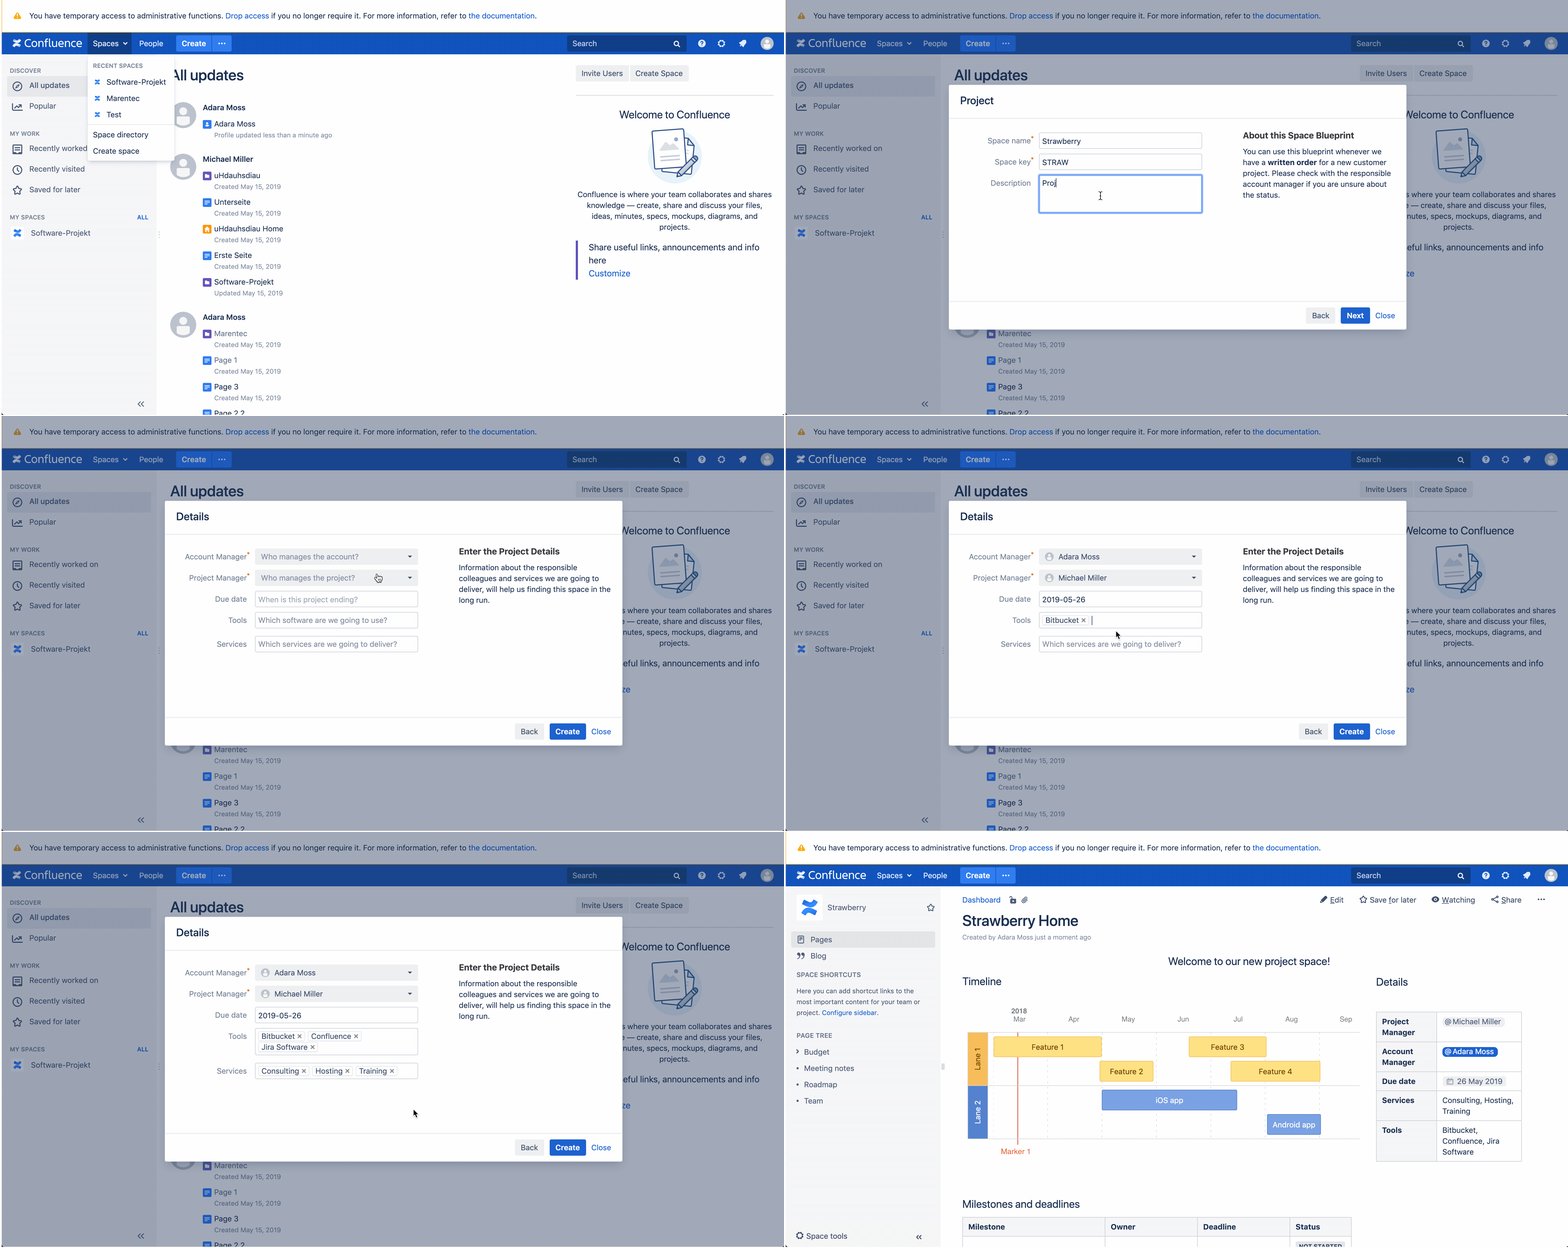
If you click ‘Save' the placeholder will be permanently deleted. They will neither show up in the placeholder sidebar of the Space Blueprint nor in the Space Blueprint Form when creating a new space.
Once deleted placeholders cannot be restored.
Your changes in the Space Blueprint Form directly affect the display for users who create new spaces using the Space Blueprint.
On this page
